Configuration in CMP Admin
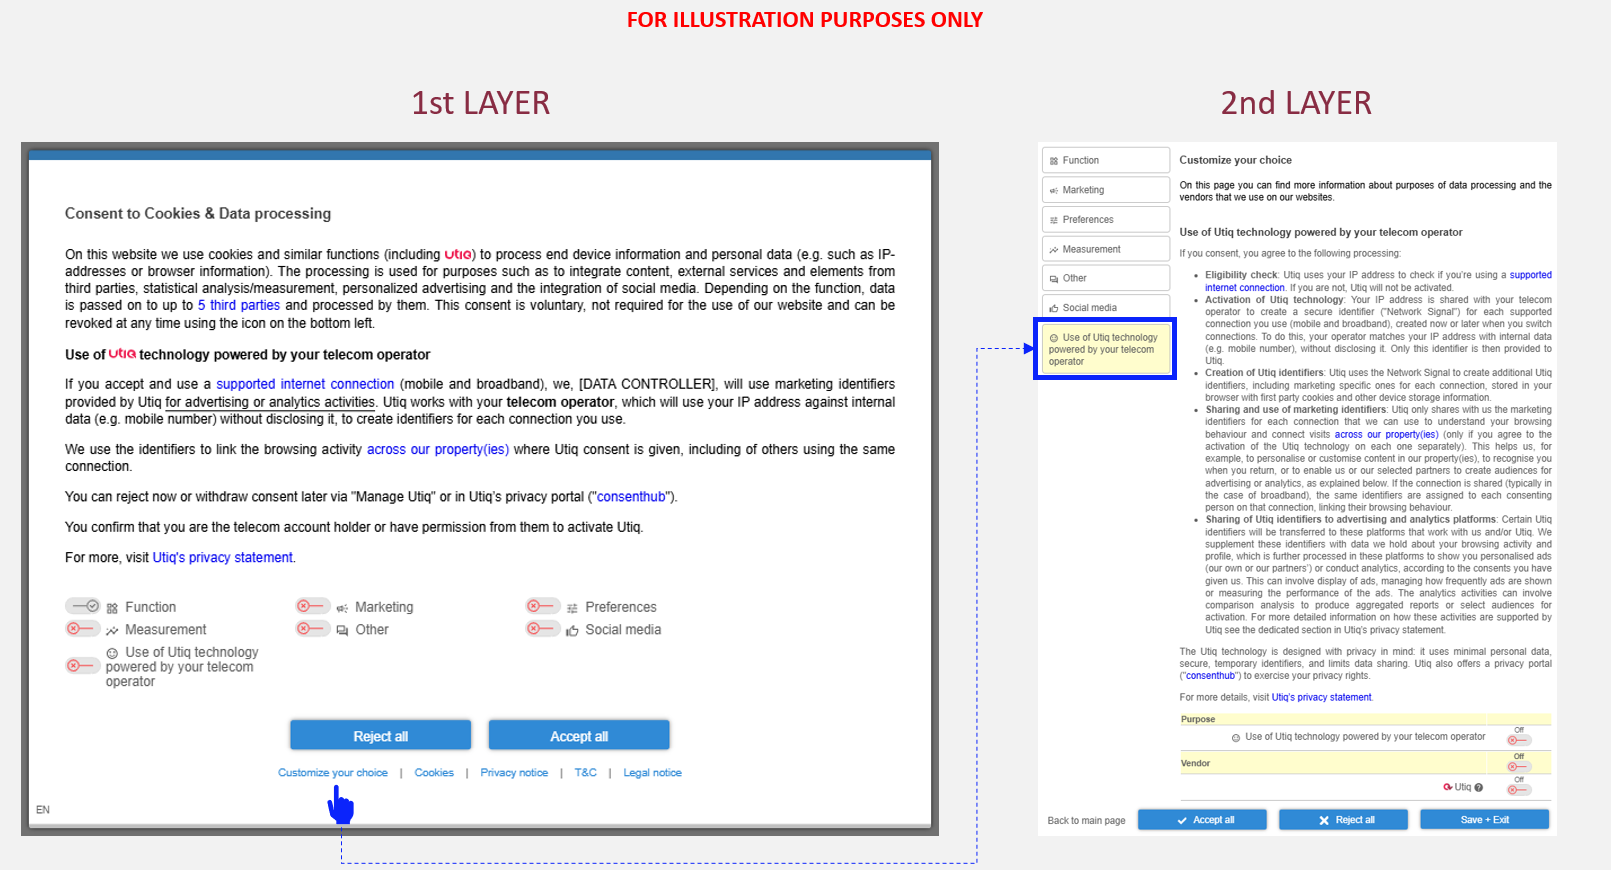
1st layer
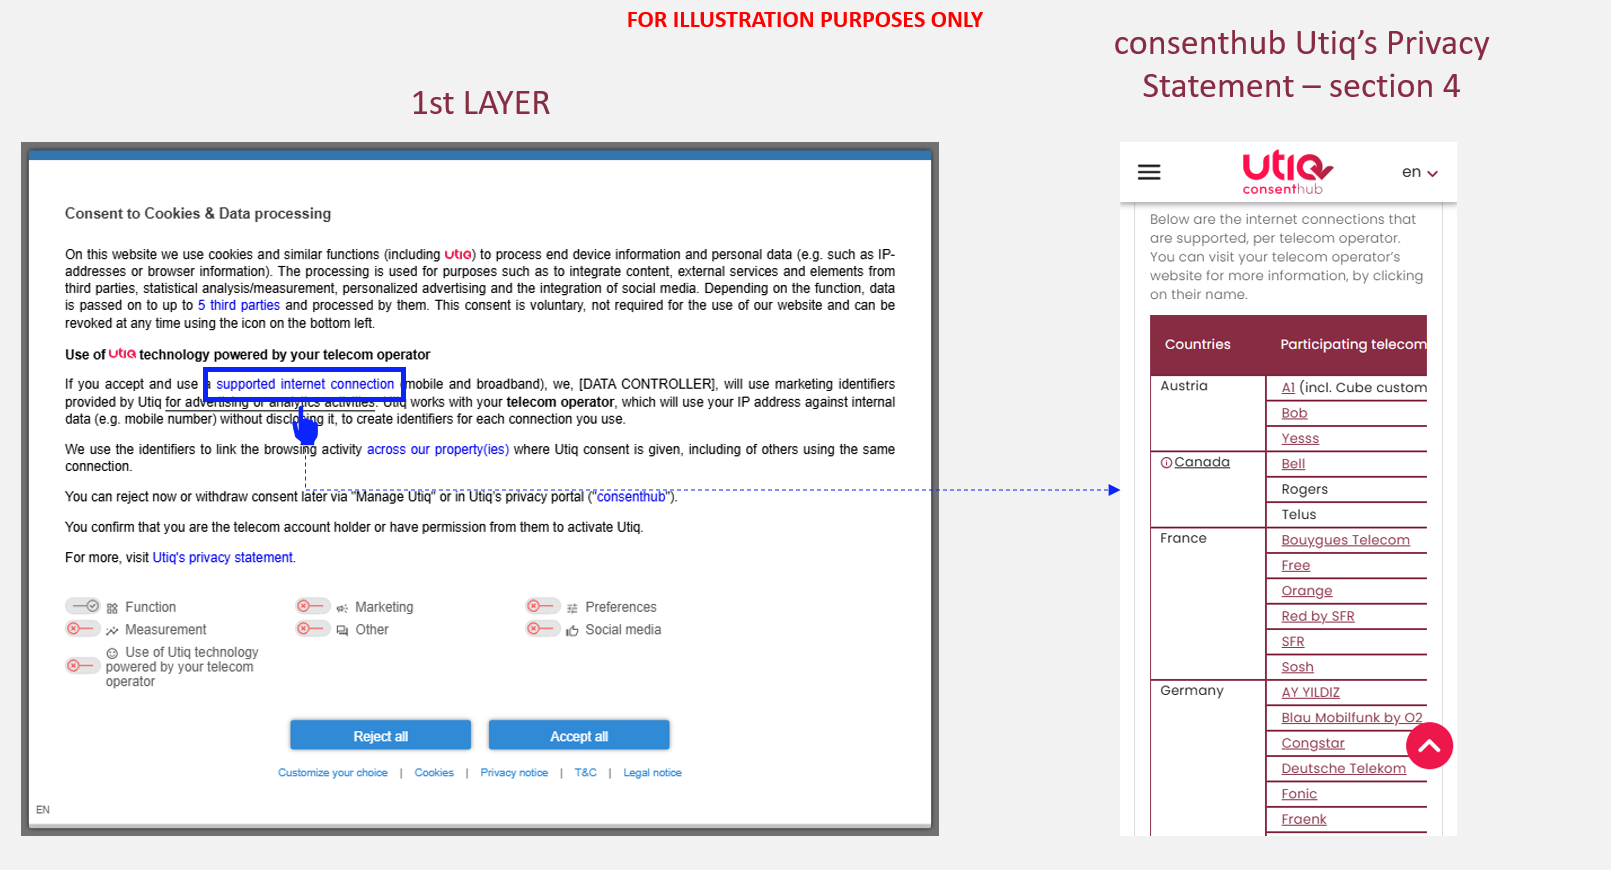
Utiq consent text (1st layer)
Utiq consent text (1st layer) for “Integrated Model” can be found here.
Set up the functionalities in the Utiq Integrated Model text
Configurable elements
The Utiq consent text contains configurable elements.
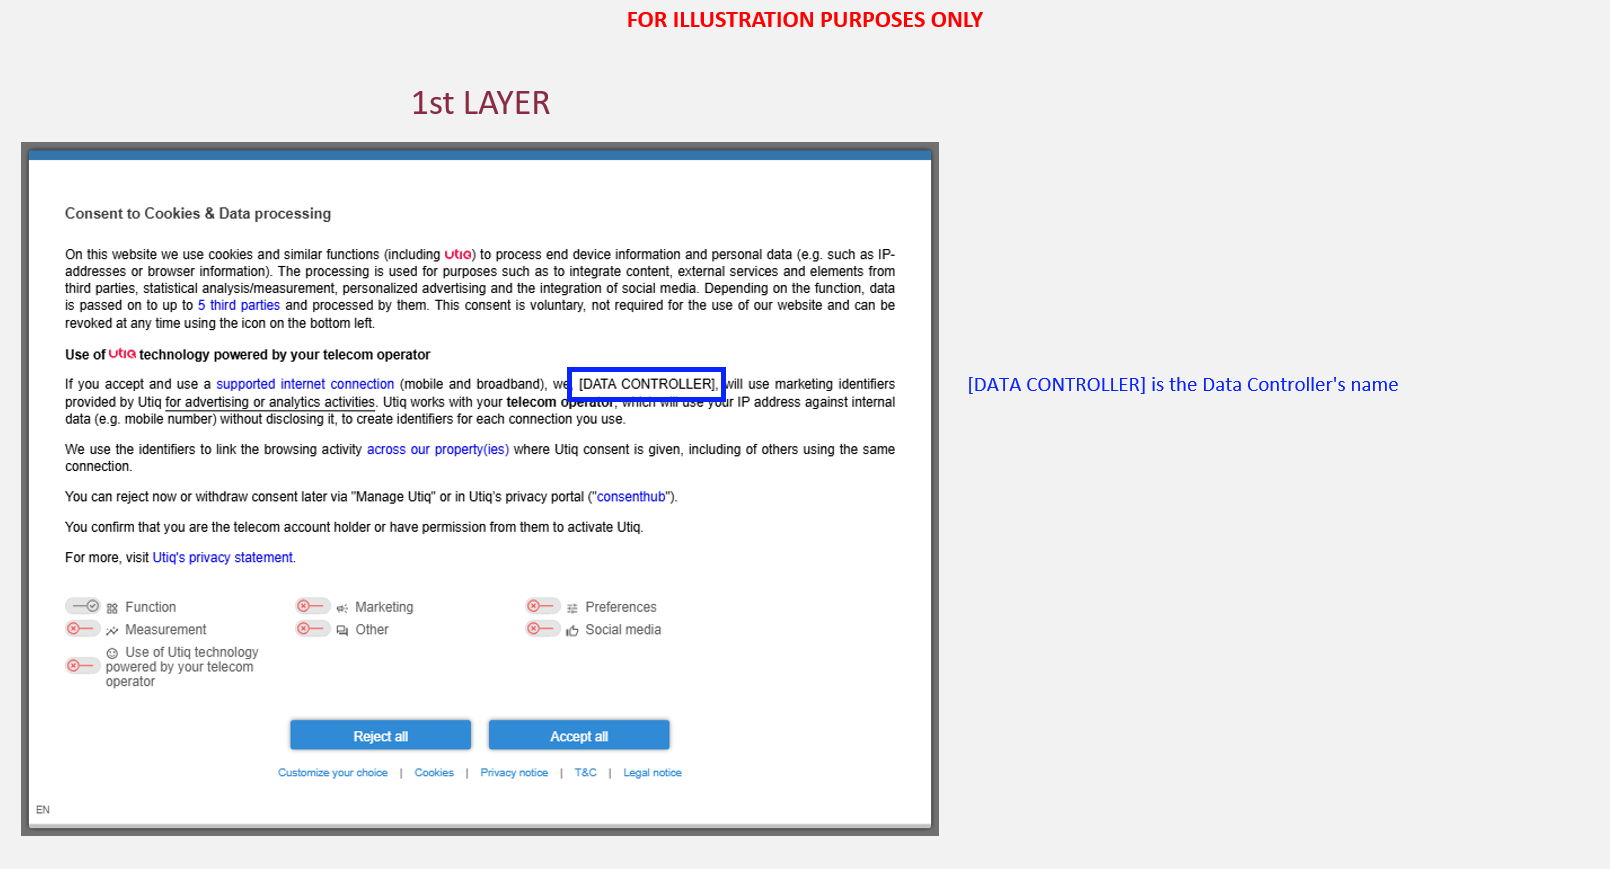
You will need to populate dedicated configurable elements with your details:
-
[DATA CONTROLLER]: Data Controller’s name and legal form → the legal entity that owns the website as mentioned on the website’s Privacy Policy page
-
(for Consent or Pay Model only): [BUTTON WORDING FOR PAY OPTION] → label/wordings used for the “Pay” option button
Clickable elements
The Utiq consent text (1st layer and Utiq purpose displayed in the 2nd layer of the CMP) contains clickable elements.
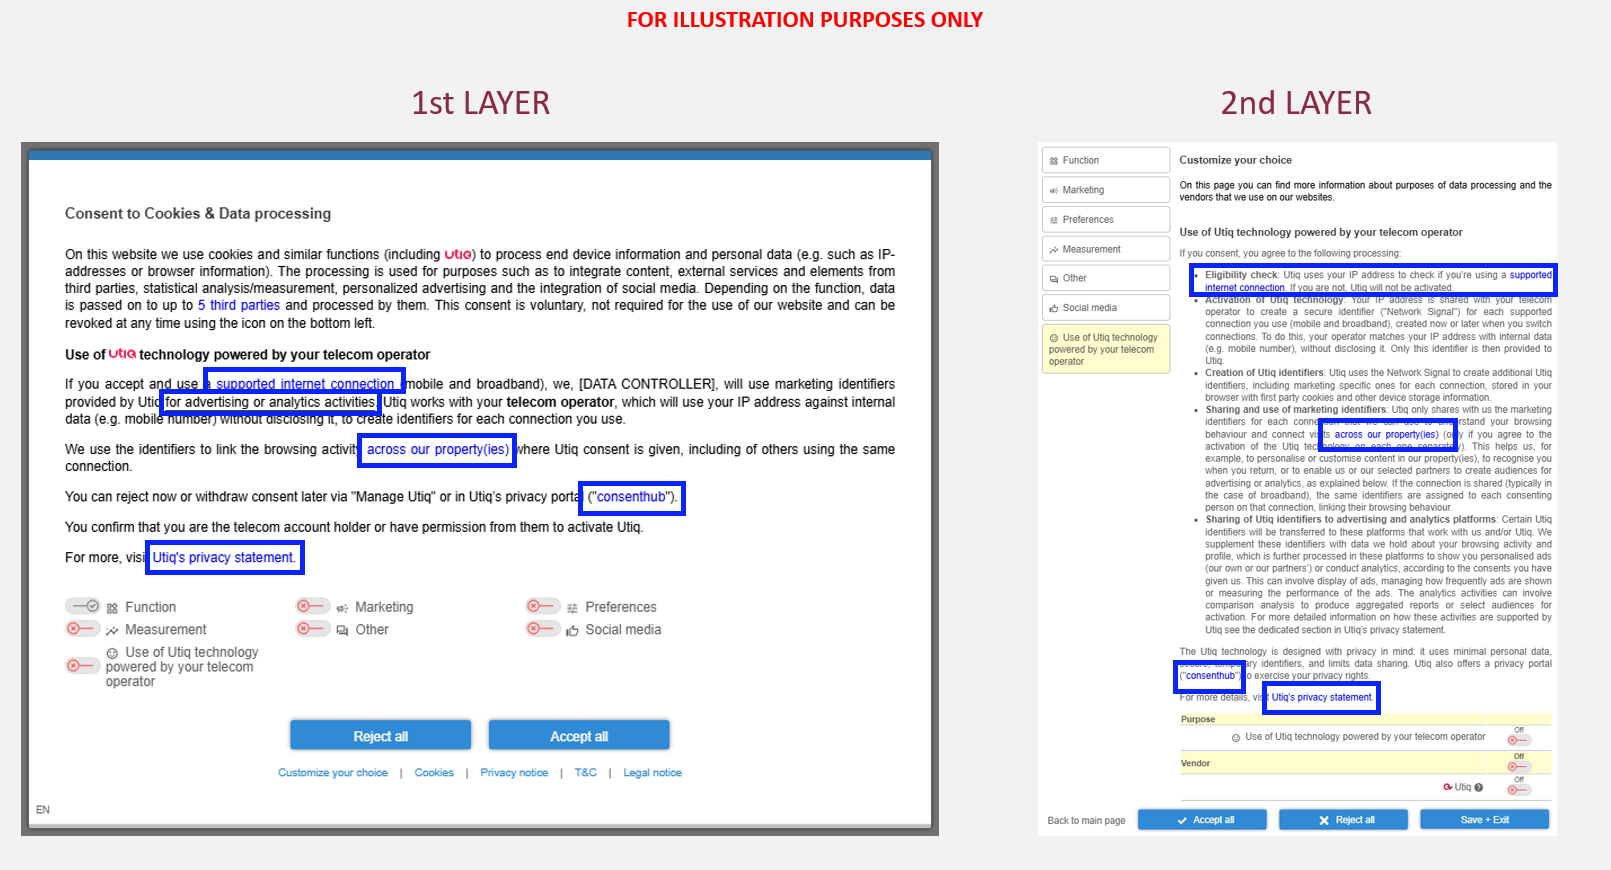
You will need to implement hyperlinks that open in a new page for clickable elements within Utiq consent text:
-
supported internet connection: the reference to participating telecom operators in scope within the Utiq consent text must be correctly hyperlinked and direct the user to the relevant section within Utiq’s Privacy Statement containing the list of all participating telecom operators per country → https://consenthub.utiq.com/pages/privacy-statement#telecom-operators
-
for advertising or analytics activities → this function must open the Advertiser/Publisher’s own privacy statement
-
across our property(ies) → https://consenthub.utiq.com/pages/digital-properties?domain=[INSERT DIGITAL PROPERTY] with already pre-filtered the digital property (e.g. website/app) the user is coming from (e.g. example.com - without www). This page lists the cross domain websites in scope (i.e., all digital properties that would make use of the same martechpass value), providing transparency also on Group of companies and Data Controllers

-
(for Consent or Pay Model only): You can reject Utiq now → a function to open the second layer of the CMP.
-
consenthub: https://consenthub.utiq.com/
-
Utiq's privacy statement: https://consenthub.utiq.com/pages/privacy-statement
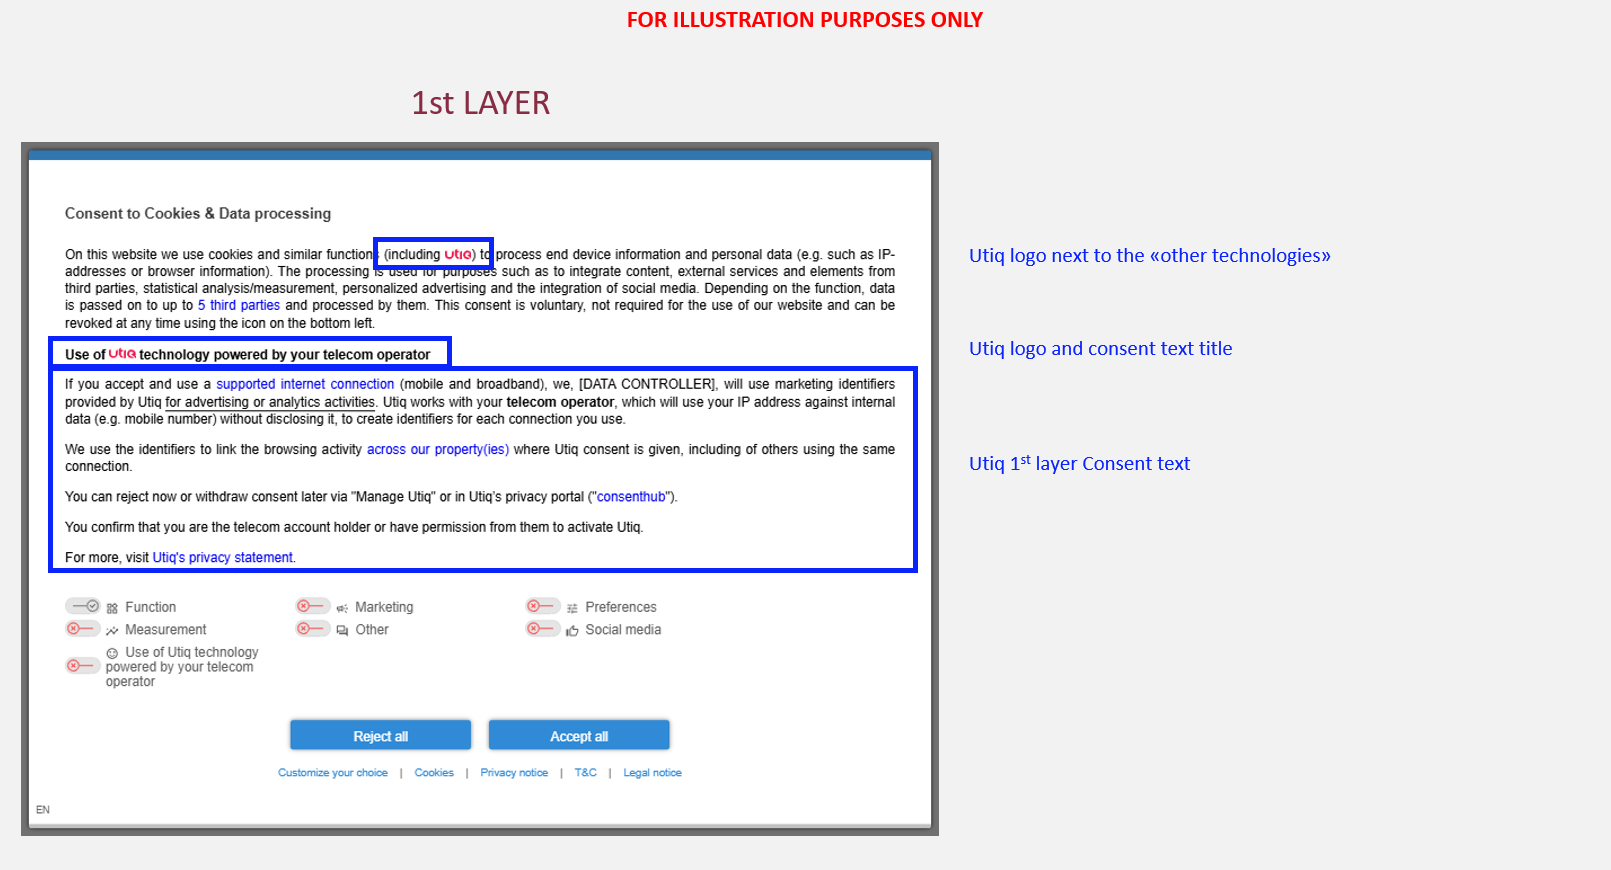
Utiq logo next to "other similar technologies"
In case scrolling is required to view Utiq consent text, Utiq logo must be placed in a fully visible section of the CMP (logo must be clickable and, if clicked, to scroll automatically to the Utiq section).
The most logical place is expected to be next to the mention of use of similar tracking technologies.
Please add Utiq logo, using the following code - remember to optimize the style attribute:
(including <span><svg xmlns="http://www.w3.org/2000/svg" fill="none" style="vertical-align:baseline;width:2em !important;padding-top:0.2em" viewBox="0 0 83 27"><path fill="#ed174c" d="M31 6v14q2 11 12 12v-6q-5-1-5-6v-9h5V6h-5V0q-6 1-7 6m26 13q1 12 13 13h7q0-5-7-6-6-1-7-7 1-7 7-8 7 0 8 7l-2-2-5 4 12 12 13-13q-4-3-8 0l-5 5 1-5Q83 6 70 5 58 6 57 19m-36-7v7q0 7-7 7-7-1-8-7V6H0v13q1 12 14 13 12-1 13-13V6q-5 0-6 6m26 0v20h6V6q-5 1-6 6"></path></svg><span style="position: absolute; width: 0; height: 0; clip: rect(0 0 0 0);">Utiq</span></span>)
Utiq title, Utiq logo and Utiq consent text (1st layer)
Add the Utiq title, Utiq logo and Utiq consent text (1st layer) in your CMP 1st layer.
In CMP Admin > go to "Designs" > select each language you support (e.g. "EN") > add in "Text"
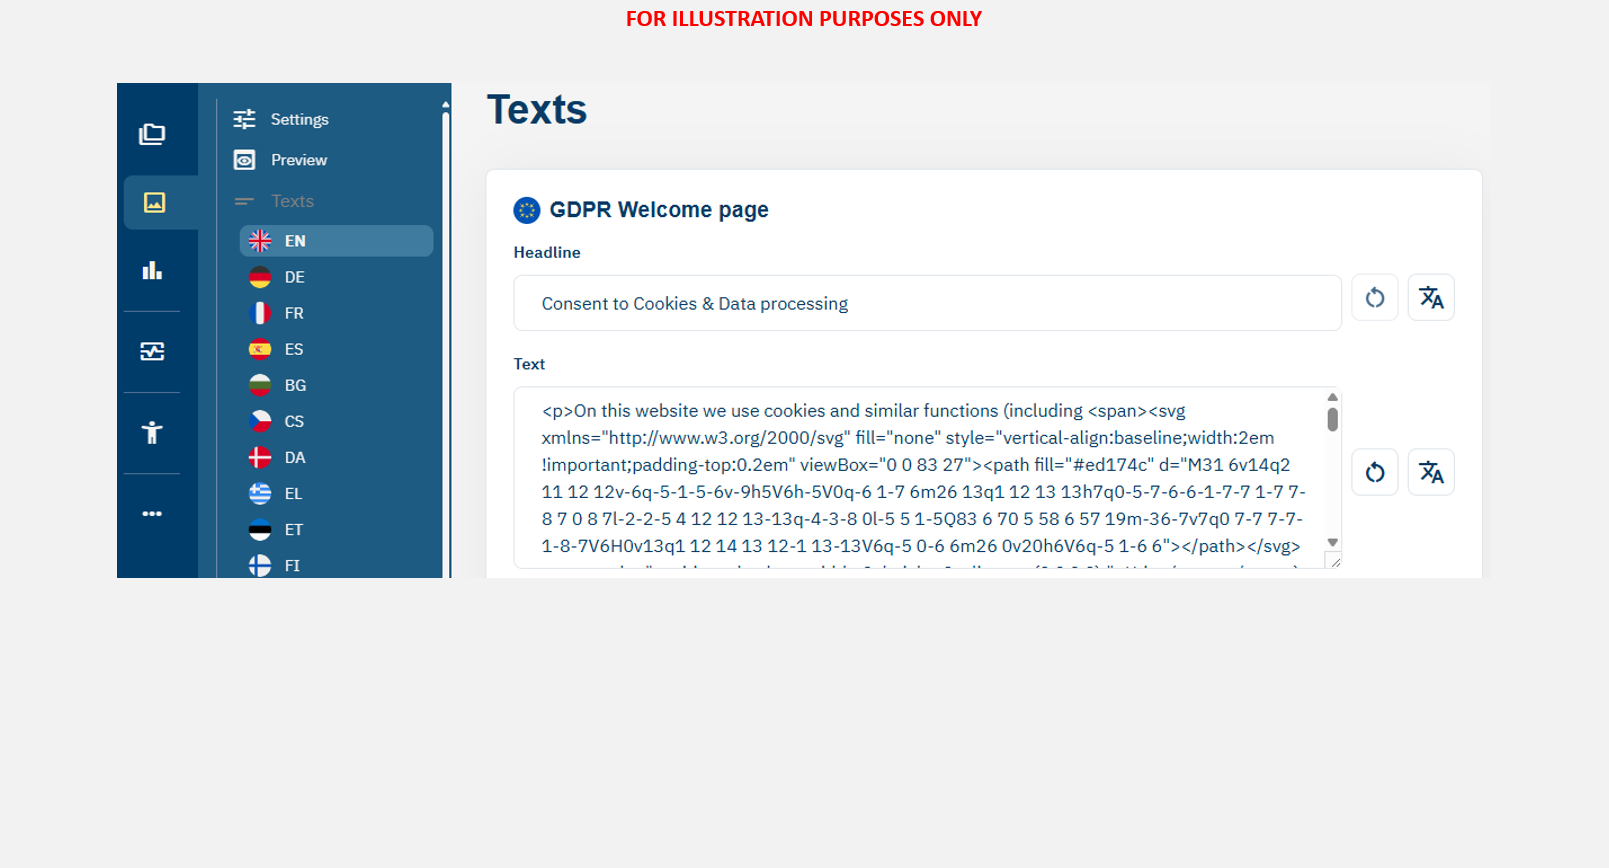
Please add Utiq title, Utiq logo and Utiq consent text, using HTML code found on latest Utiq Transparency Texts.
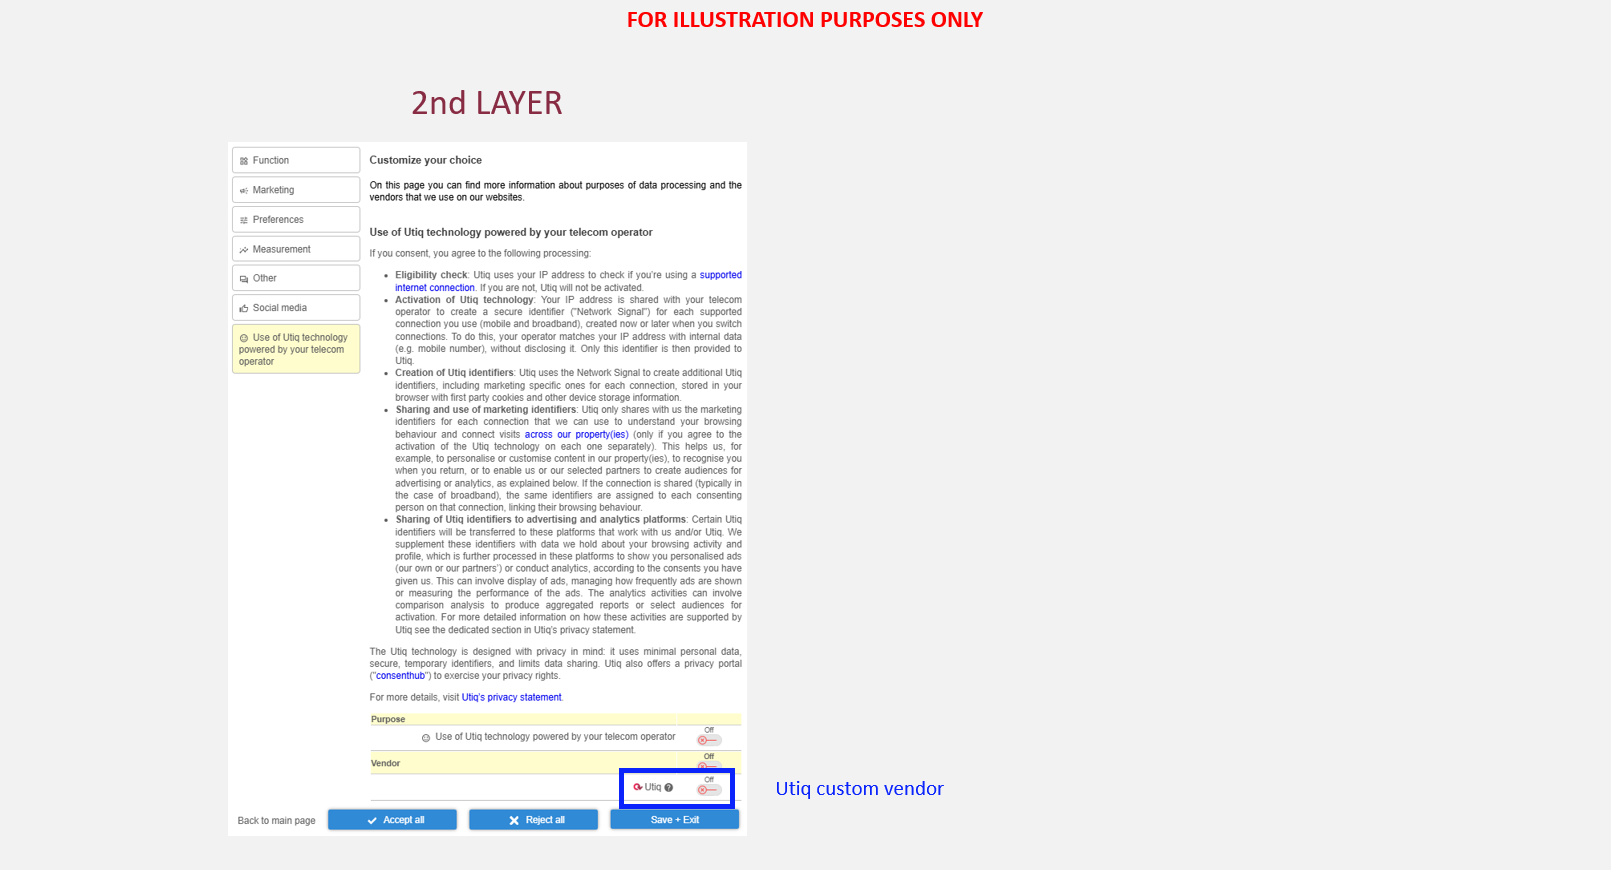
Utiq purpose displayed in the 2nd layer of the CMP
Utiq custom purpose
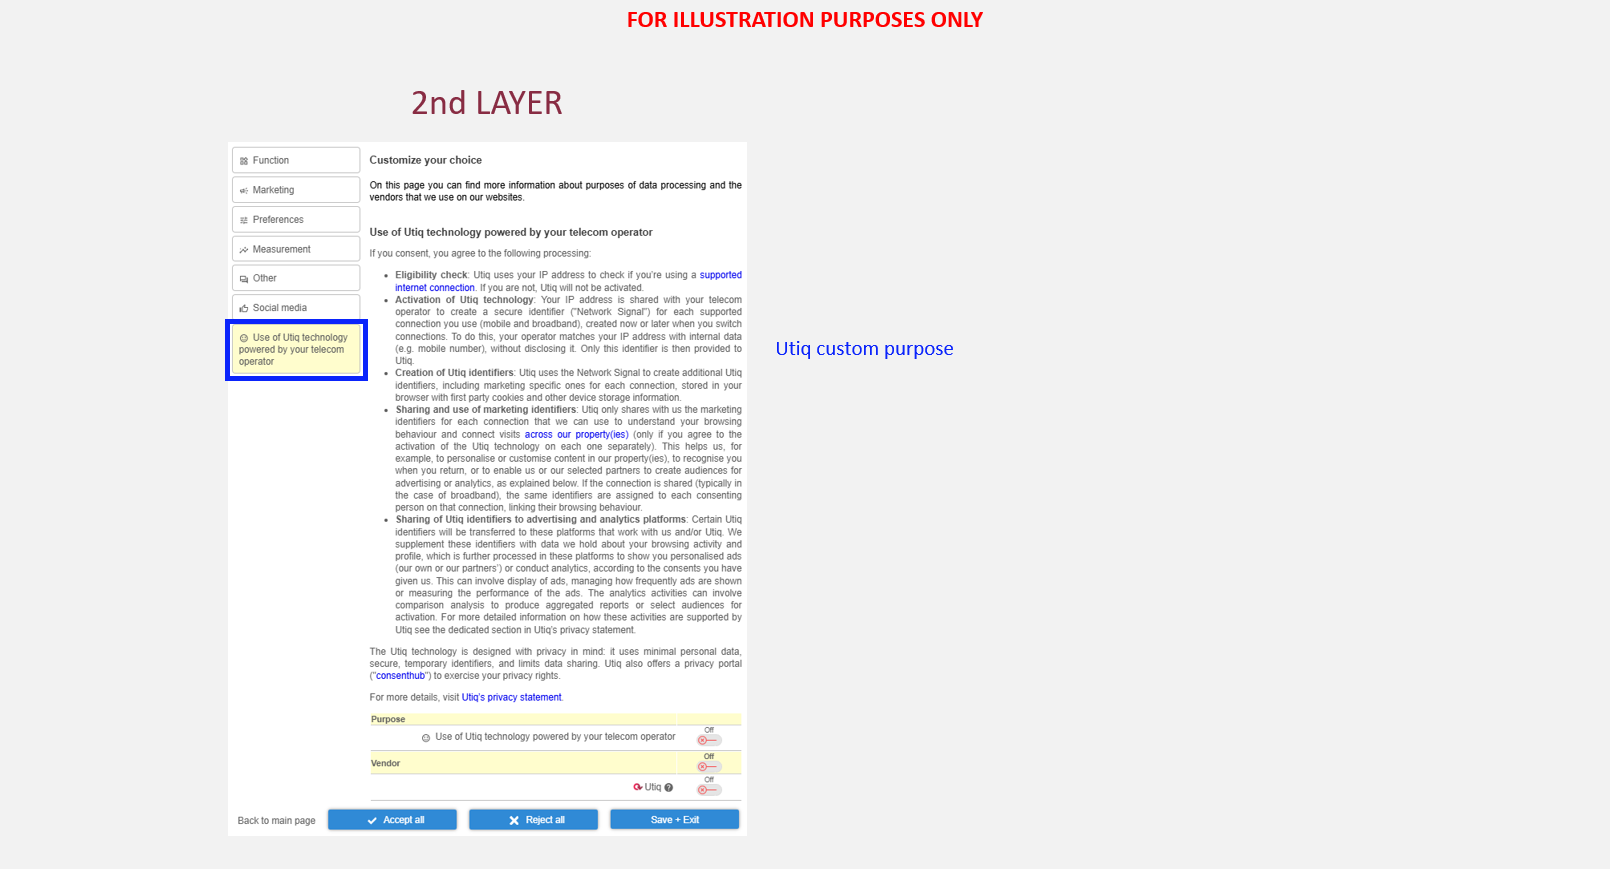
Utiq consent must be collected both for Utiq custom purpose and for Utiq custom vendor.
When you configure the Utiq custom purpose, please use the following text:
In CMP Admin > go to "CMPs" > select your CMP notice > go to "Purposes" > click "Add purpose"
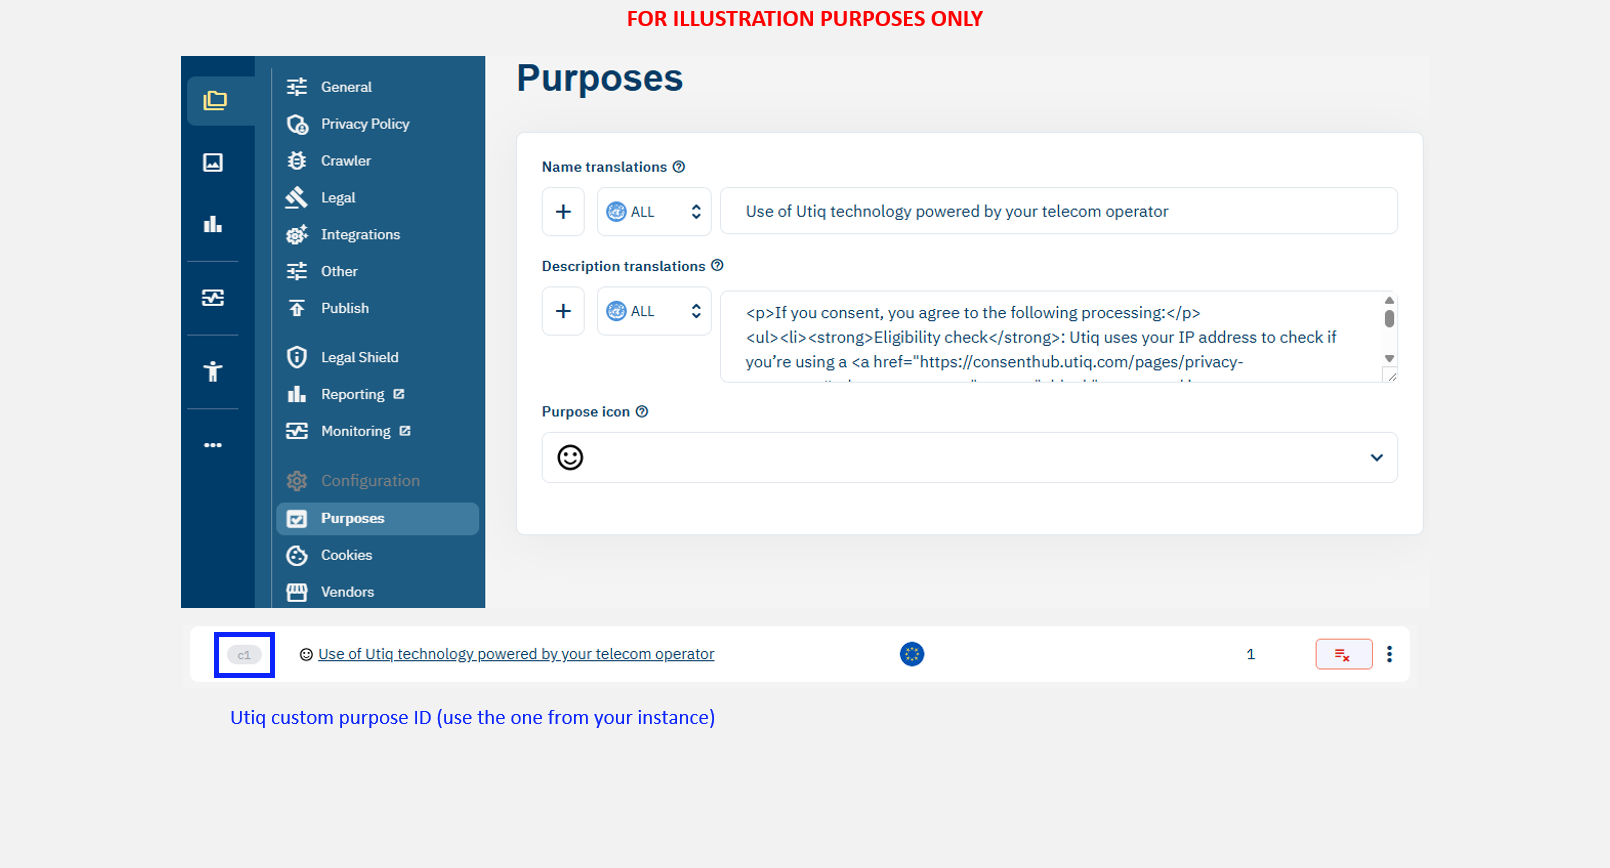
Please add purpose description using HTML code found on latest Utiq Transparency Texts
Utiq custom vendor
Utiq consent must be collected both for Utiq custom purpose and for Utiq custom vendor.
In CMP Admin > go to "CMPs" > select your CMP notice > go to "Purposes" > click "Add vendor"
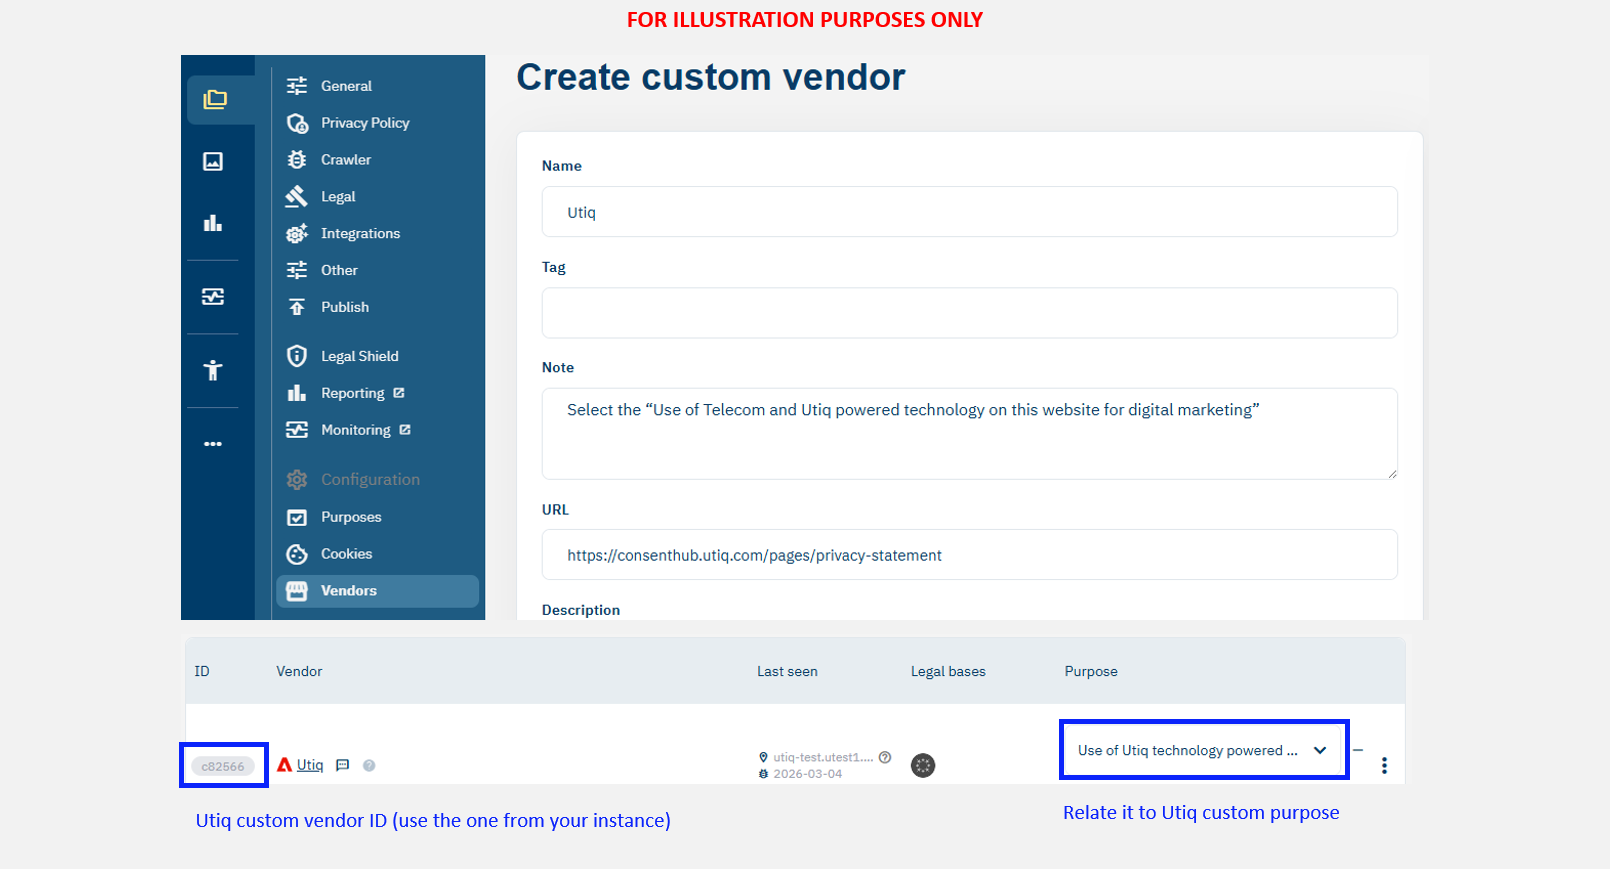
Please add vendor description using the following text:
|
Vendor name |
Utiq |
|
Privacy Policy |
|
|
Purposes based on consent |
<select the “Use of Telecom and Utiq powered technology on this website for digital marketing”> |
Relate Utiq cookies & storage to Utiq custom vendor
Utiq cookies & storage found here or here must be related to Utiq custom vendor.
Consent Validity Timeframe
The consent validity timeframe (the time after which consent should be re-requested) for Utiq consents for the Integrated Model is aligned with your CMP consent validity timeframe and up to a possible 13 month maximum period.
Technical implementation
Technical steps
Please follow the steps as described here to integrate.
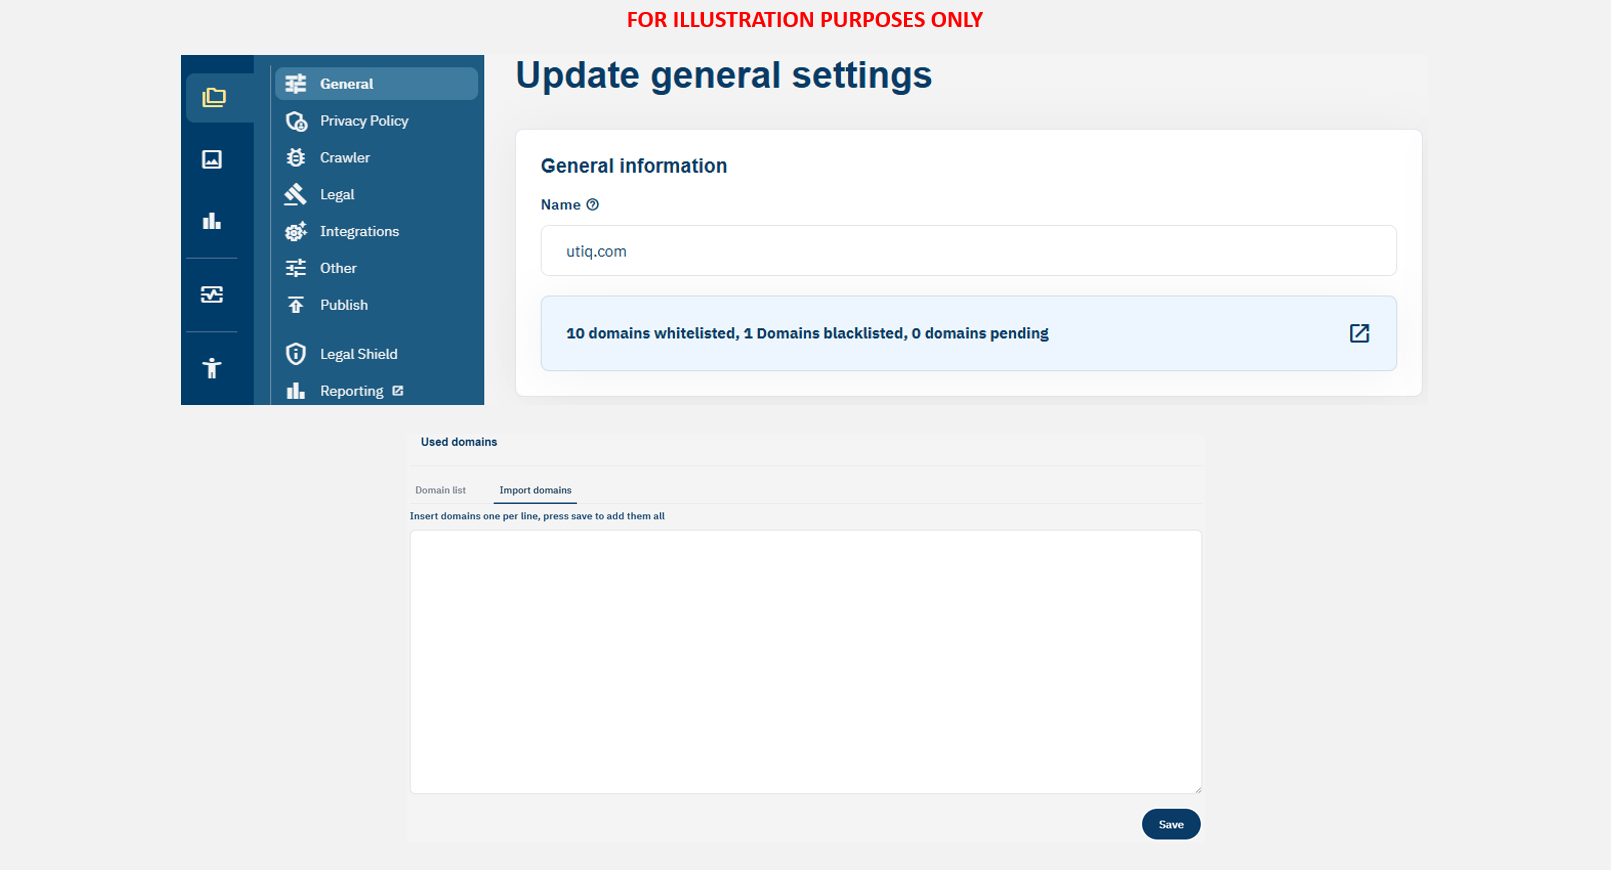
Telco endpoints whitelisting
The CMP is blocking any API calls done on top-level domain(s) different from the site’s top-level domain, by default. Utiq SDK, to fulfill Telco Identification is executing an iframe where an API call to the individual user’s Telco is done, based on the IP address of the connection. Each Telco has it’s own distinct endpoint on different top-level domains.
To allow proper testing with testing stubs and going live with Network Signals, certain endpoint for stubs and list of Telco endpoints must be whitelisted, accordingly.
Please contact onboard@utiq.com to verify which endpoints whitelisting is needed for your domain(s) and for your country.
The configuration is done in the below location.
In CMP Admin > go to "CMPs" > select your CMP notice > go to "General" > click blue "whitelisting" > add one endpoint per line in "Import domains" > click "Approve"
Correct configuration of accept and reject functions
-
The CMP must be configured to ensure that Utiq calls are only triggered if user accepts Utiq consent. This means if the user either clicks on:
-
"accept all" or
-
accept Utiq custom purpose ("Use of Telecom and Utiq powered technology on this website for digital marketing") and Utiq customer vendor.
-
-
Utiq technology must be off by default.
-
No Utiq calls to enable the Utiq technology shall be triggered if a user clicks on reject option.
-
Only strictly necessary cookies can be dropped if user clicks on reject option i.e., consent status.
Utiq consent withdrawal mechanisms
-
3 ways to withdraw Utiq consents:
-
via the CMP: by re-opening the CMP and changing the preferences, the users can withdraw Utiq consent.
-
via the consent revocation dedicated functionality hosted in the Manage Utiq page (see “Set up the user functionalities in the dedicated “Manage Utiq” page”).
-
via consenthub: https://consenthub.utiq.com/
-
Utiq script ensures synchronization CMP-consenthub-Consent withdraw function hosted in Manage Utiq page.
-
Utiq SDK should be loaded on all site pages, to be able to ensure consent synchronization of the user.